The Perfect Chocolate Chip Cookies
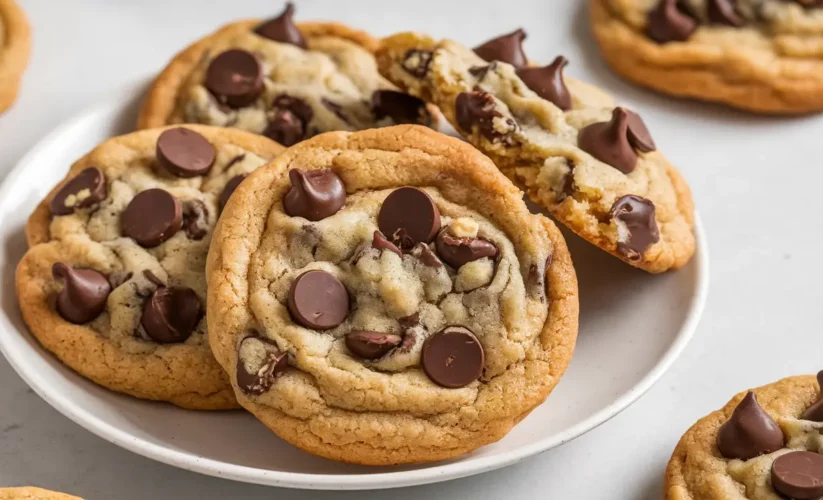
There’s something universally comforting about The Perfect Chocolate Chip Cookies. From the moment you catch a whiff of them baking, with their warm, gooey chocolate and golden-brown edges, they evoke memories of childhood treats, cozy afternoons, and the simple joys of homemade food. But let’s be honest: not all chocolate chip cookies are created equal. Some are too cakey, others too crispy; some lack flavor, while others are overly sweet. After years of experimenting, tweaking, and obsessing over every ingredient, I’ve finally landed on what I believe to be the perfect chocolate chip cookie recipe.
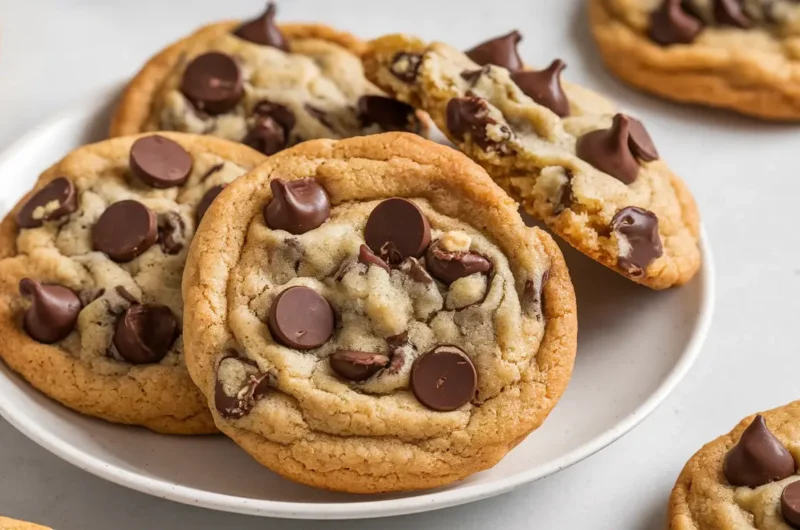
This isn’t just another cookie recipe. It’s the culmination of my culinary journey, informed by science, creativity, and countless test batches (my family and friends didn’t complain!). It’s the kind of cookie that’s slightly crisp at the edges, delightfully chewy in the center, and packed with gooey pools of melted chocolate. Each bite is balanced: rich but not cloying, sweet but nuanced, indulgent but familiar.
In this blog, I’m going to take you through every detail of creating these cookies. Whether you’re a seasoned baker or a beginner in the kitchen, this guide will walk you through the techniques, the science, and the small but impactful tweaks that elevate these cookies from good to great. By the end, you’ll not only have a recipe but also the knowledge to tailor it to your preferences. Let’s dive into the delicious world of chocolate chip cookies!
Why This Recipe Works
The magic of this recipe lies in the combination of thoughtful ingredient choices, precise techniques, and a touch of patience. Each element is designed to maximize flavor and texture. Here’s why it works:
- Browned Butter: By browning the butter, we add a deep, nutty richness that enhances the overall flavor.
- Brown Sugar Dominance: Using more brown sugar than white creates a chewier texture and adds subtle caramel notes.
- Chilled Dough: Letting the dough rest in the fridge allows the flavors to meld and the texture to improve.
- Proper Ratios: The balance of wet and dry ingredients ensures the cookies spread just the right amount.
- High-Quality Chocolate: Instead of chips, we use chopped chocolate for pockets of gooey goodness.
The Perfect Chocolate Chip Cookies
15
minutes10
minutesIngredients
1 cup (2 sticks) unsalted butter, browned and cooled slightly
1 cup packed dark brown sugar
1/2 cup granulated sugar
2 large eggs
2 teaspoons pure vanilla extract
2 1/4 cups all-purpose flour
1 teaspoon baking soda
1 teaspoon kosher salt
2 cups chopped dark chocolate or chocolate wafers
Optional: Flaky sea salt for sprinkling
Directions
- Brown the Butter: In a medium saucepan, melt the butter over medium heat. Continue cooking, swirling the pan occasionally, until the butter foams and turns a deep golden brown with a nutty aroma. Remove from heat and let it cool slightly.
- Mix Sugars and Butter: In a large bowl, whisk together the browned butter, brown sugar, and granulated sugar until smooth. Add the eggs one at a time, beating well after each addition. Stir in the vanilla extract.
- Combine Dry Ingredients: In a separate bowl, whisk together the flour, baking soda, and salt. Gradually add the dry ingredients to the wet ingredients, mixing just until combined.
- Fold in Chocolate: Gently fold in the chopped chocolate pieces, ensuring they are evenly distributed.
- Chill the Dough: Cover the dough and refrigerate for at least 24 hours (up to 72 hours) to develop the best flavor and texture.
- Preheat and Scoop: When ready to bake, preheat your oven to 350°F (175°C). Line baking sheets with parchment paper. Scoop dough into 2-tablespoon-sized balls and place them 2 inches apart on the prepared sheets.
- Bake: Bake for 10-12 minutes, or until the edges are golden and the centers look slightly underbaked. Sprinkle with flaky sea salt while still warm, if desired.
- Cool and Enjoy: Let the cookies cool on the baking sheet for 5 minutes before transferring them to a wire rack. Serve warm or at room temperature.
Not-So-Cookie-Cutter Techniques
To achieve these cookies, I had to step outside the traditional cookie box. Here are a few unconventional techniques that make all the difference:
- Browning the Butter: It’s a small extra step that pays off with big flavor.
- Chilling the Dough: Patience is key; chilling the dough allows the flour to fully hydrate and the flavors to deepen.
- Using Chopped Chocolate: Unlike chips, chopped chocolate creates pockets of molten chocolate and a better distribution throughout the cookie.
Examining the Elements
Each component of this recipe plays a critical role. Let’s break it down:
- Butter: Browning the butter intensifies its flavor, adding a nutty complexity.
- Sugars: A higher ratio of brown sugar ensures a moist and chewy texture, while the granulated sugar contributes to crisp edges.
- Flour: All-purpose flour provides structure, but don’t overmix to avoid tough cookies.
- Chocolate: High-quality chocolate makes a noticeable difference. Opt for at least 60% cacao for the best flavor.
- Salt: Don’t skimp on salt! It balances the sweetness and enhances all the flavors.
Waiting for Better Flavor
Why chill the dough? This step is a game-changer. Resting the dough:
- Allows the flour to absorb moisture, leading to a better texture.
- Gives time for the flavors to meld, resulting in a richer taste.
- Reduces spreading during baking, helping maintain the ideal thickness.
Keys to Success
To ensure your cookies turn out perfectly every time, keep these tips in mind:
- Measure Precisely: Baking is a science, so weigh your ingredients if possible.
- Don’t Overmix: Overworking the dough can develop gluten, leading to tough cookies.
- Watch the Oven: Every oven is different; start checking the cookies at the 10-minute mark.
Browned Butter
Browning butter is a game-changer when it comes to baking, especially cookies. This simple yet transformative technique takes your standard cookie recipe to new heights by infusing the dough with a complex, nutty, and caramel-like flavor. But what exactly makes browned butter so special, and why is it considered the secret weapon for better cookies?
When you heat butter over the stove, it goes through a fascinating transformation. As it melts, the water content in the butter begins to evaporate. Next, the milk solids, which are naturally present in butter, start to separate and settle at the bottom of the pan. Here’s where the magic happens: by continuing to cook the butter gently, these milk solids undergo a process known as the Maillard reaction. This chemical reaction caramelizes the milk solids, turning them golden brown and releasing a rich, toasty aroma that fills your kitchen.
The result is a beautiful golden-brown liquid with tiny specks of caramelized solids that pack a flavor punch. It’s often described as having a nutty, slightly sweet profile with hints of toffee and butterscotch. These flavors are perfect for cookies because they add depth and complexity without being overpowering. Browned butter enhances the sweetness of sugar and balances the richness of other ingredients, like chocolate chips or nuts, creating a perfectly harmonized flavor profile.
In addition to flavor, browned butter contributes to the texture of cookies. Because the water in the butter evaporates during the browning process, you’re left with a more concentrated fat. This can result in a chewier, more tender cookie, as the fat plays a key role in how the dough bakes and spreads in the oven.
Using browned butter is easy. Simply melt unsalted butter in a light-colored saucepan over medium heat, stirring constantly to prevent burning. Once you see golden flecks at the bottom and smell that unmistakable nutty aroma, remove it from the heat immediately. Allow it to cool slightly before incorporating it into your recipe.
In short, browned butter is like liquid gold for The Perfect Chocolate Chip Cookies. It’s a simple technique with a big payoff, ensuring that every bite of your cookies is irresistibly flavorful and perfectly textured. Try it once, and you’ll never go back!
Brown Sugar vs. White Sugar
The ratio of brown sugar to white sugar has a significant impact on the texture and flavor of your cookies. Brown sugar, with its molasses content, creates a chewier cookie and adds caramel undertones. White sugar, on the other hand, encourages spreading and a crisper edge. By using more brown sugar, we achieve the perfect chewy texture.
Protein Reduction
Reducing the protein content in flour by not overmixing and carefully measuring ensures tender cookies. Overmixing can activate too much gluten, making cookies tough instead of soft and chewy.
Conclusion
Creating The Perfect Chocolate Chip Cookies is both an art and a science. By paying attention to each ingredient and technique, you can elevate a humble cookie into something truly special. These cookies are more than just a treat; they’re an experience, a memory, and a testament to the joys of homemade food. Whether you enjoy them warm with a glass of milk or pack them up for a loved one, these cookies are guaranteed to bring a smile to anyone’s face. Happy baking!

