

Every can of pumpkin puree started as a pumpkin once — so why does canned taste so different from what you can make yourself? Real sugar pumpkins turn into a deeper, less watery, more genuinely pumpkin-flavored pie than anything from a can, and the process is a lot less fussy than it sounds.
Most home bakers who try it once make the same mistake and never try again: they use the wrong kind of pumpkin, skip a step that canned pumpkin does for you at the factory, and end up with a pie that never fully sets. Once you know what that step is, fresh pumpkin pie is no harder than the canned version — it just takes an extra hour of mostly hands-off time.
What makes pumpkin pie from sugar pumpkins so good
Not every orange pumpkin is meant for eating. Grocery stores and pumpkin patches sell two very different kinds side by side, and they’re grown for opposite purposes. Carving pumpkins (the big, round, thin-walled kind sold for jack-o-lanterns) are bred for size and an easy-to-cut shell — their flesh is stringy, watery, and mild to the point of bland. Sugar pumpkins (also sold as pie pumpkins or sugar pie pumpkins) are smaller, denser, and bred specifically for eating: less water, more natural sugar, and a deeper, more concentrated pumpkin flavor. Grab the wrong one at the store and no amount of spice will fix a thin, watery filling.
Here’s the part that trips up almost everyone who tries fresh pumpkin pie for the first time: canned pumpkin isn’t just cooked pumpkin — it’s cooked down and concentrated at the factory until most of the water is gone. Fresh puree straight off a roasted pumpkin is noticeably wetter than what comes out of a can, even from a dense sugar pumpkin. Pour that extra water straight into a pie filling and the custard never fully sets; you end up with a pie that’s soupy in the middle no matter how long it bakes. The fix is draining the puree before it ever touches the other ingredients — a step canned pumpkin has already done for you, and the single biggest reason homemade pumpkin pie fails.
The upside is worth the extra step. Fresh-roasted sugar pumpkin has a rounder, more complex flavor than canned — slightly nuttier, less one-note sweet — and once you’ve drained the puree properly, it behaves exactly like the canned version in any recipe. This one absorbs the whole “how do you prepare pumpkin for pie” question in the two sections below: roasting versus steaming, and how long to drain.
Key ingredients and why they matter
| Key Ingredient | What To Use | Why It Matters |
|---|---|---|
| Pumpkin | 1 sugar pumpkin (also called pie pumpkin), about 6 lbs | Denser and sweeter than a carving pumpkin, with far less water to drain out. |
| Eggs | 3 large eggs, plus 1 extra yolk | The extra yolk adds structure to offset the small amount of moisture fresh puree still holds even after draining. |
| Evaporated milk | 3/4 cup (slightly less than most canned-pumpkin recipes call for) | Fresh puree is wetter than canned, so cutting the milk back keeps the filling from turning soupy. |
| Sugar | 3/4 cup granulated + 1/2 cup packed brown sugar | Brown sugar adds a light molasses depth that pairs well with fresh pumpkin’s rounder flavor. |
| Spices | Cinnamon, ginger, cloves, nutmeg, salt | Fresh pumpkin is milder than canned, so a slightly heavier hand with spice keeps the flavor balanced. |
| Pie crust | 1 unbaked 9-inch pie crust | Store-bought or homemade both work; blind-baking isn’t necessary for this filling. |
How to make it
- Roast the sugar pumpkin halves until fork-tender, then scoop out and puree the flesh.
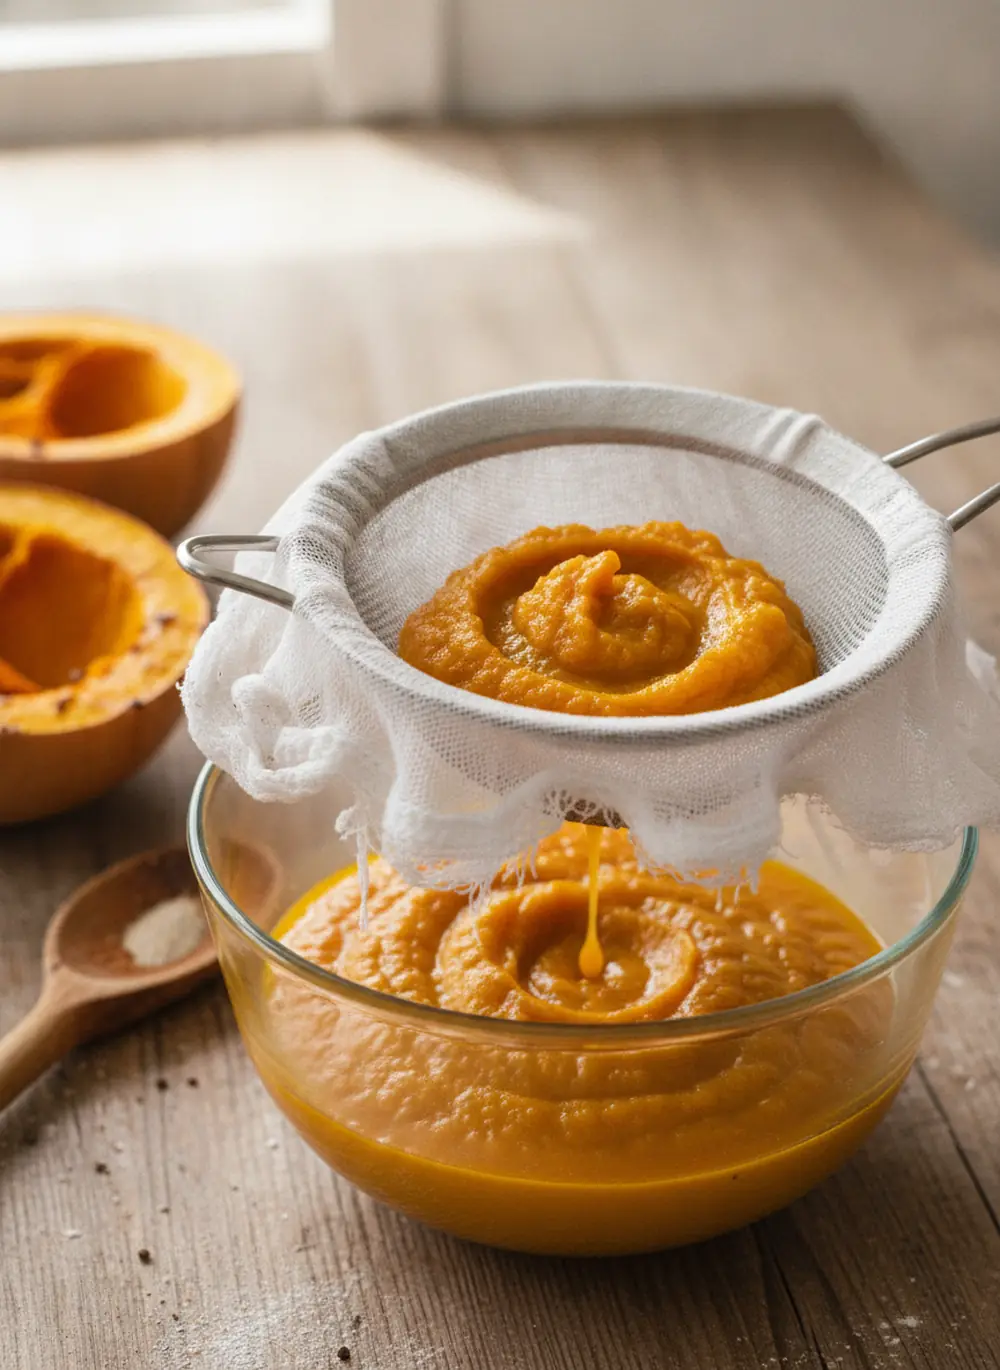
- Drain the puree in a cheesecloth-lined strainer to remove the extra water canned pumpkin never has.
- Whisk the drained puree with the eggs, sugars, spices, and evaporated milk.
- Pour into the crust and bake until the center is just barely set, then cool completely before slicing.
Pumpkin Pie from Sugar Pumpkins
A from-scratch pumpkin pie made with real roasted sugar pumpkin — the draining step is what makes it set as cleanly as the canned version.
Ingredients
- 1 sugar pumpkin (about 6 pounds), or 2 cups drained fresh pumpkin puree
- 1 unbaked 9-inch pie crust
- 3 large eggs, plus 1 extra egg yolk
- 3/4 cup granulated sugar
- 1/2 cup packed brown sugar
- 1 teaspoon ground cinnamon
- 1/2 teaspoon ground ginger
- 1/4 teaspoon ground cloves
- 1/4 teaspoon ground nutmeg
- 1/2 teaspoon salt
- 3/4 cup evaporated milk
Instructions
- Preheat the oven to 400°F (204°C). Cut the sugar pumpkin in half through the stem, scoop out the seeds and stringy pulp, and place the halves cut-side down on a lined baking sheet.
- Roast 45–50 minutes, until a fork slides into the thickest part of the flesh with no resistance and the skin looks wrinkled. Let cool until safe to handle.
- Scoop the flesh away from the skin and puree it in a food processor or blender until smooth.
- Line a fine-mesh strainer with cheesecloth, set it over a bowl, and add the puree. Let it drain in the refrigerator for at least 1 hour, ideally overnight — you should end up with about 2 cups of thick, well-drained puree.
- Reduce the oven to 350°F (177°C). In a large bowl, whisk the drained puree with the eggs and extra yolk until smooth.
- Whisk in the granulated sugar, brown sugar, cinnamon, ginger, cloves, nutmeg, and salt, then whisk in the evaporated milk until fully combined.
- Pour the filling into the unbaked pie crust and place on a baking sheet to catch any drips.
- Bake 50–60 minutes, until the edges are set and the center still jiggles slightly like gelatin when nudged — it will finish setting as it cools.
- Cool on a wire rack for at least 2 hours before slicing. Refrigerate if not serving the same day.
Sugar pumpkin vs. carving pumpkin
If the bin at the store isn’t clearly labeled, a few quick checks tell you which pumpkin you’re holding.
| Trait | Sugar Pumpkin | Carving Pumpkin |
|---|---|---|
| Size | Small, 6–8 inches across, 4–8 lbs | Large, often 10+ inches, 10–25+ lbs |
| Flesh | Dense, less water, deep orange | Stringy, watery, paler orange |
| Flavor | Sweeter, more concentrated | Bland, needs heavy sweetening |
| Shape | Slightly flattened, squat | Tall, round, symmetrical |
| Best use | Pies, soups, roasting for eating | Carving; edible but disappointing in pie |
Roasting vs. steaming: which method to use
Both methods get you to the same place — soft, pureeable pumpkin — but they don’t produce the same puree. Boiling is the one method to skip entirely: submerging the pumpkin in water adds moisture at exactly the stage you’re trying to remove it, leaving you with a much longer, less effective drain afterward.
| Method | Time | Result |
|---|---|---|
| Roasting (recommended) | 45–50 minutes at 400°F | Concentrates flavor as it cooks; least watery puree, shortest drain time |
| Steaming | 15–20 minutes, cubed | Faster, but flesh takes on more water — plan on a longer drain |
| Boiling (not recommended) | 15–20 minutes, cubed | Waterlogged flesh and diluted flavor; avoid for pie filling |
| Microwave | 10–12 minutes, halved | Fine for a single small pumpkin; drain the same as roasted |
Common problems and how to fix them
| Problem | Likely Cause | Easy Fix |
|---|---|---|
| Pie is soupy or never sets | Puree wasn’t drained, or wasn’t drained long enough | Drain in cheesecloth for at least 1 hour, ideally overnight, before mixing the filling |
| Filling tastes bland | Used a carving pumpkin instead of a sugar pumpkin | Look for pumpkins labeled “sugar,” “pie,” or “sugar pie” at the store or patch |
| Puree is stringy or grainy | Not pureed long enough, or roasted at too low a temperature | Blend until completely smooth; roast at a full 400°F so the flesh softens evenly |
| Center still liquid after cooling | Pulled from the oven before the edges fully set | Bake until only the very center jiggles like gelatin, not liquid — it firms up as it cools |
| Crust edges over-brown | No shielding during the longer fresh-pumpkin bake | Cover the crust edge with foil or a pie shield for the last 20 minutes |
| Cracked surface | Oven ran too hot, or the pie cooled too fast | Bake at 350°F and let the pie cool gradually on the counter, not in the fridge |
Variations and customizations
- Maple pumpkin pie. Swap the brown sugar for 1/3 cup maple syrup, added with the evaporated milk.
- Bourbon pumpkin pie. Whisk in 1 tablespoon bourbon with the spices for a warm, boozy note.
- Heavy cream version. Substitute heavy cream for the evaporated milk for a richer, less sweet filling.
- Mini pies. Divide the filling among a muffin tin lined with small crust rounds; bake 25–30 minutes.
- Streusel top. Sprinkle a brown sugar, flour, and butter streusel over the filling before baking instead of serving plain.
- Freezer-ahead puree. Roast and drain a double batch of pumpkin, then freeze extra puree flat in bags for a head start next time.
Tips for the best results
- Pick a heavy pumpkin for its size with matte, not waxy, skin — that’s usually the denser, less watery one.
- Don’t skip the overnight drain if you have time. An hour works in a pinch, but overnight gets noticeably more water out and a firmer, cleaner-sliced pie.
- Weigh the puree if you can. Two cups of well-drained puree should weigh close to a standard 15-ounce can of pumpkin — if yours weighs meaningfully more, drain it a little longer.
- Let the pie cool undisturbed for the full two hours. Cutting it warm, even when the center looks set, gives you a slice that won’t hold its shape.
Storage
Keep the finished pie covered in the refrigerator for up to 4 days. It also freezes well: wrap tightly once fully cooled and freeze for up to 2 months, then thaw overnight in the fridge before serving. Drained, unbaked puree keeps in the fridge for about 3 days, or in the freezer for up to 3 months — thaw it in the refrigerator and give it a quick re-drain if any water has separated out.
If you’d rather skip the crust altogether, our crustless pumpkin pie uses the same doneness cues in a simpler bake. For the classic canned-pumpkin version side by side, see our pumpkin pie with evaporated milk. And if fall baking has you in the mood for more, our caramel carrot cake shares the same warm-spice pantry.
Frequently Asked Questions
How do you prepare pumpkin for pie?
Cut a sugar pumpkin in half, remove the seeds, and roast it cut-side down at 400°F for 45–50 minutes until fork-tender. Scoop out the flesh, puree it smooth, then drain it in a cheesecloth-lined strainer for at least an hour — ideally overnight — before using it in any recipe that calls for canned pumpkin.
Can I use a carving pumpkin instead of a sugar pumpkin?
You can, but the pie will taste noticeably blander and the flesh is more watery and stringy. Sugar pumpkins (also sold as pie pumpkins) are bred specifically for eating and give a sweeter, denser result worth seeking out.
Do I really need to drain the puree?
Yes. Canned pumpkin is cooked down at the factory until most of the water is gone; fresh puree hasn’t had that done to it. Skipping the drain is the single most common reason homemade pumpkin pie comes out soupy and never fully sets.
Does fresh pumpkin taste different from canned?
Yes, and most people who try it prefer it — fresh sugar pumpkin has a rounder, slightly nuttier flavor than canned, which tends to taste more one-note sweet. Once properly drained, it bakes and sets exactly like canned pumpkin.
How long does fresh pumpkin puree keep?
Drained puree keeps in the refrigerator for about 3 days. For longer storage, freeze it flat in a freezer bag for up to 3 months, then thaw in the fridge and give it a quick extra drain before using.
Can I freeze pumpkin puree from a fresh pumpkin?
Yes. Freeze well-drained puree in an airtight bag or container for up to 3 months. Some water separates out during thawing, so drain it again briefly before mixing your filling.
Worth the extra hour
Pumpkin pie from a real sugar pumpkin isn’t a harder recipe than the canned version — it’s the same recipe with one extra step. Pick a dense sugar pumpkin over a big carving one, roast it instead of boiling it, drain the puree properly, and you’ll end up with a deeper-flavored pie than anything that started in a can.